What Is the Mandatory Daily Maintenance Routine for a DTG Printer? | GNFEI
What Is the Mandatory Daily Maintenance Routine for a DTG Printer?
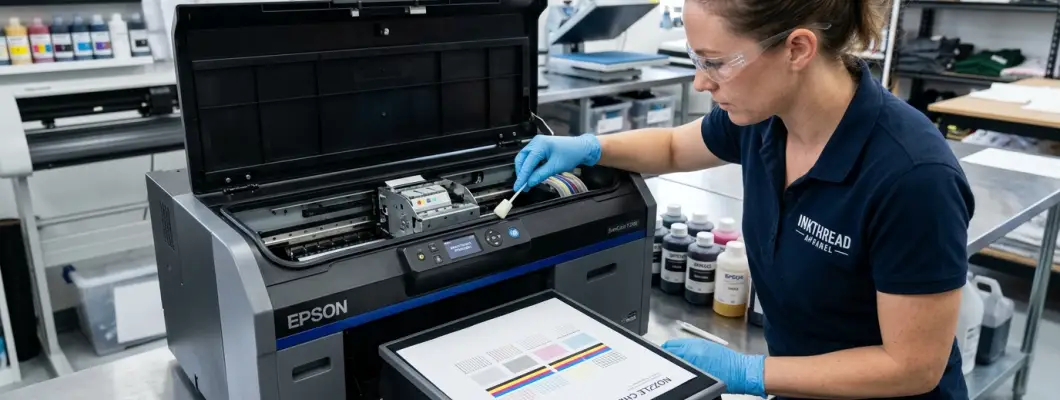
In the world of custom garment decoration, Direct-to-Garment (DTG) printing offers unparalleled photographic color fidelity, ultra-soft hand feel, and exceptional on-demand profitability. However, commercial DTG equipment differs fundamentally from standard office or wide-format aqueous graphics printers. Operating a DTG printer is an exercise in managing a volatile fluid suspension: water-based textile inks loaded with reactive binding resins and dense white titanium dioxide (TiO2) pigments that are formulated to cure quickly upon heat application.
When exposed to ambient shop air, the carrier humectants in textile ink evaporate within minutes, transforming from a free-flowing 3-to-4 centipoise liquid into a sticky, elastic latex film. Without a rigorous, standardized daily maintenance discipline, this rapid evaporation leads directly to nozzle dropouts, misdirected jet trajectories, and eventually terminal micro-piezo crystal destruction. Committing just 10 to 12 minutes per operating day to a structured maintenance protocol is the single highest-return investment any apparel decorator can make, preventing thousands of dollars in premature printhead replacement costs and unscheduled production downtime.
The Golden Rule of Commercial DTG Production
"A DTG printer does not forgive neglect." Unlike solvent or UV curing equipment that can tolerate occasional operational oversights, water-based textile ink never sleeps. A printer maintained with strict 5-minute morning and 7-minute evening protocols can operate reliably for 18 to 24+ months on a single printhead, whereas a neglected machine can suffer permanent nozzle failure in less than two weeks.
1. Chronological Daily Maintenance SOP: The Three Operational Phases
Professional DTG print shops divide daily maintenance into three distinct chronological phases: Phase 1: Morning Start-of-Day Setup, Phase 2: Mid-Production Lint & Platen Care, and Phase 3: End-of-Day Shutdown & Wet Capping. Adhering to this structured cadence ensures that ink stagnation is addressed before printing commences and that atmospheric seal integrity is guaranteed overnight.
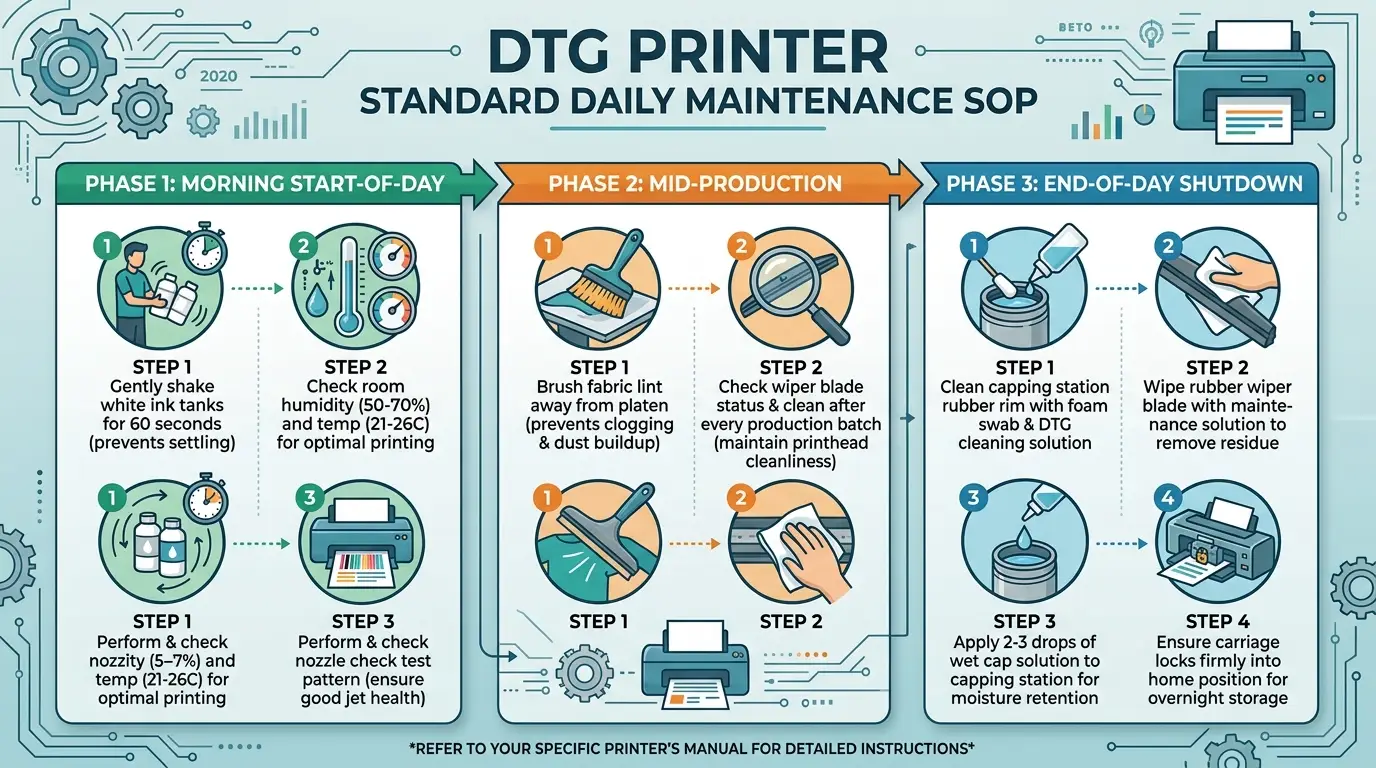
Figure 1: Complete chronological Standard Operating Procedure (SOP) workflow for daily DTG printer care
2. Phase 1: Morning Start-of-Day Protocol (3 to 5 Minutes)
Before switching on the main power supply or sending print queues from your RIP software, your machine requires physical and environmental preparation. Never begin production on a machine that has sat static overnight without completing these four sequential steps:
1 Step 1: Gentle White Ink Bottle Agitation (60 Seconds)
Because white DTG ink relies on heavy titanium dioxide mineral particles (specific gravity ~4.2 g/cm³), overnight standing causes the solid pigments to sink toward the bottle floor. Remove each white ink bulk bottle or cartridge and gently rock it back and forth in an inverted figure-eight motion for 45 to 60 seconds. Caution: Do not shake violently like a cocktail shaker, as vigorous shaking whips atmospheric air into the ink, creating microscopic micro-bubbles that will cause starvation and nozzle dropouts when drawn through the dampers.
2 Step 2: Environmental Hygrometer & Temperature Verification
Inspect your digital shop hygrometer. Water-based textile ink requires a strictly controlled environment:
- Relative Humidity (RH): Must be between 50% and 70%. If your shop is below 45% (common in heated winter shops or air-conditioned summer rooms), activate your ultrasonic cool-mist humidifier immediately. Low humidity dries out nozzle openings within 90 seconds of carriage movement.
- Ambient Temperature: Must be maintained between 20°C and 28°C (68°F – 82°F). Colder temperatures elevate ink viscosity, causing ink starvation; higher temperatures accelerate volatile solvent evaporation.
3 Step 3: Platen Surface Inspection & Anti-Lint Sweep
Inspect the garment platen and guide rails. Use a sticky lint roller or microfiber towel to sweep away any stray airborne textile lint, pre-treatment crust, or dust that settled overnight. A single strand of cotton fuzz resting on the platen can catch on the printhead nozzle plate during scanning, dragging ink across the face and inducing instantaneous nozzle deflections.
4 Step 4: The Mandatory Morning Nozzle Check Test Pattern
Power on the printer, load a scrap sheet of white paper or clear PET film, and initiate an onboard nozzle check print. Examine every stepped ladder grid under bright inspection light:
- 100% Intact Grid: Proceed directly to commercial garment printing.
- 1 to 3 Missing Nozzles (White channels): Perform one single light cleaning cycle, wait 60 seconds for meniscus stabilization, and re-test. Never run multiple consecutive deep head flushes in panic, as excessive vacuum pulls air around the damper gaskets.
- Misdirected or Deflected Lines: Indicates lint on the nozzle plate rim or partial dry meniscus crusting. Move to manual wiper inspection.
3. Phase 2: Mid-Production Hygiene & Garment Shift Care
Daily maintenance does not end when production starts. Printing directly onto porous organic fabrics like ring-spun cotton, fleece, or poly-blends generates a constant cloud of airborne textile fibrils and pre-treatment aerosols. Incorporate these three mid-shift habits into your operating workflow:
- Pre-Pressing Lint Removal: Always use a high-tack lint roller on every garment before loading it onto the DTG platen, and heat-press the blank shirt for 5 to 10 seconds to flatten loose cotton fibrils. This simple step eliminates 90% of airborne lint before the shirt ever approaches the carriage.
- Periodic Wiper Blade Inspection (Every 25 to 30 Shirts): During high-volume dark shirt runs, white ink overspray and cotton dust accumulate on the rubber wiper blade. If the blade becomes crusted with a gelled paste, it stops wiping clean and instead acts like a dirty squeegee, smearing dry ink sludge across the delicate nozzle plate. Pause production, release the carriage, and gently wipe both faces of the rubber blade with a moist foam swab.
- Platen Gap Management: Whenever switching garment types (e.g., transitioning from lightweight 4.3 oz summer tees to thick 10 oz heavy hoodies), re-verify your platen gap distance. Operating with too low a clearance invites destructive head strikes, where raised fabric fibers physically collide with the mirror-finish nozzle plate.
4. Anatomy of the DTG Maintenance Station: Crucial Cleaning Zones
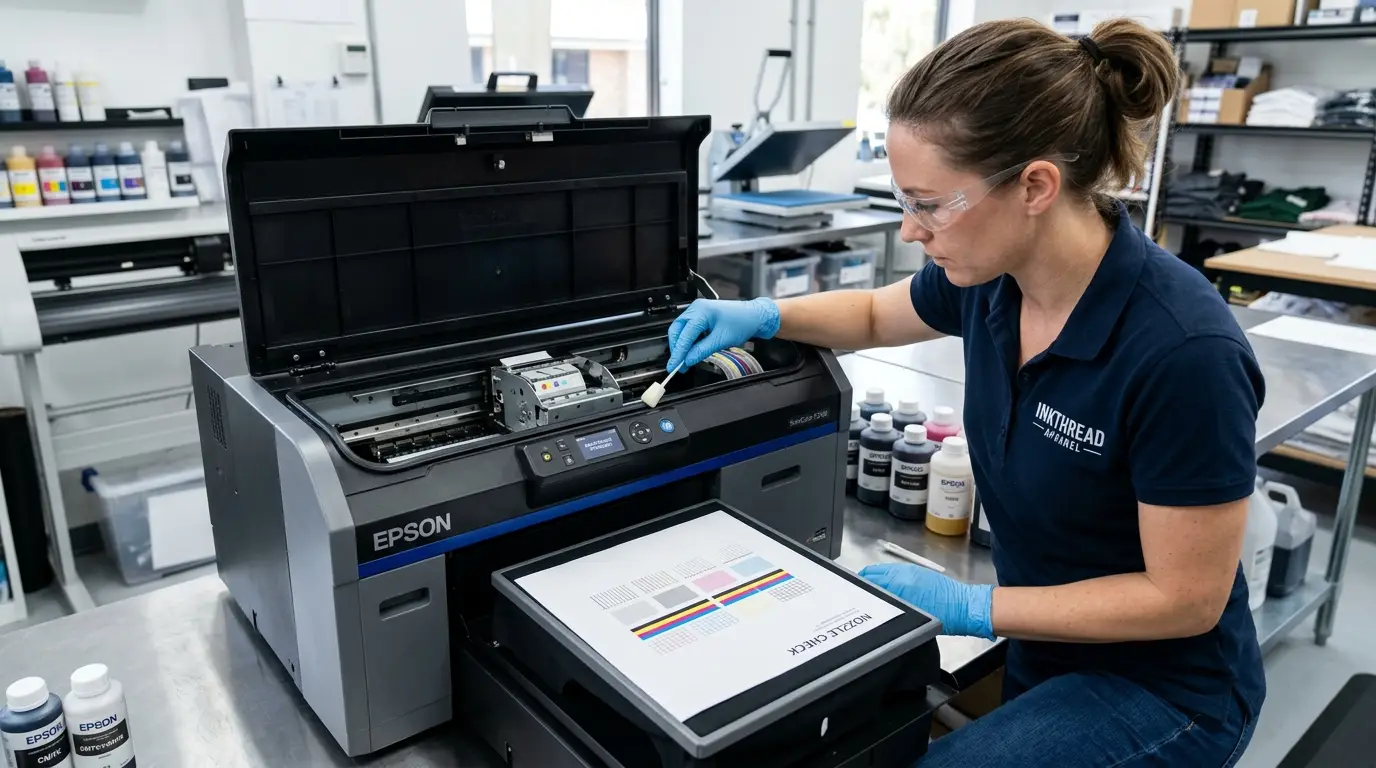
To perform maintenance effectively, an operator must understand the functional anatomy of the maintenance station located at the home docking position of the printer. The diagram below highlights the four critical zones that require daily inspection and care:
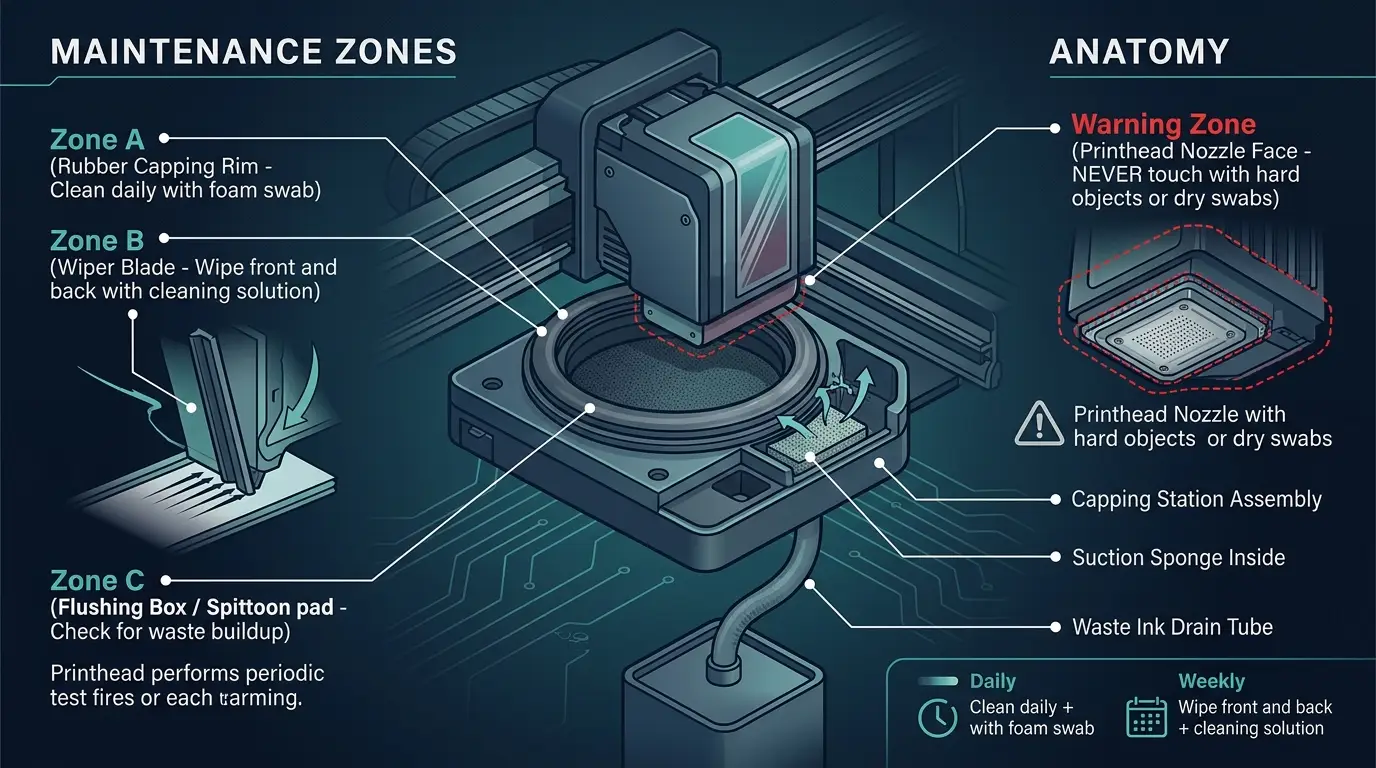
Figure 2: Component anatomy and daily cleaning zones of a commercial DTG printhead carriage docking station
| Component Zone | Function & Risk Factor | Daily Maintenance Action | Tool & Chemical |
|---|---|---|---|
| Zone A: Capping Station Rim | Forms an airtight gasket seal around the nozzle plate when docked. Dried ink crust creates air gaps that dry out nozzles overnight. | Gently trace and clean the top and inner edge of the flexible rubber lip until completely free of dried ink crust. | Lint-free polyurethane foam swab moistened with OEM DTG cleaning fluid. |
| Zone B: Rubber Wiper Blade | Squeegees excess ink droplets off the nozzle plate after suction purges. A dirty blade smears dried ink paste across nozzles. | Pinch swab against front face, wipe upward, then wipe back face and top edge. Never pull violently sideways. | Foam swab soaked in cleaning fluid. Inspect for nicks, warping, or chemical hardening. |
| Zone C: Flushing Box / Spittoon | Catches micro-purges during printing. Overfilled waste pads will back up and touch the nozzle face during carriage return. | Inspect porous absorbent pad. If saturated with congealed white ink sludge, moisten with 1 mL cleaner. | Plastic pipette with cleaning fluid; replace felt pad every 6-12 months. |
| WARNING ZONE: Printhead Nozzle Face | Houses microscopic gold or stainless nozzle orifices with delicate hydrophobic repellent coating. | NEVER TOUCH DIRECTLY with swabs, paper towels, or scrapers. Clean only via vacuum suction and automated wiper contact. | Swabbing the face directly scratches the surface and permanently ruins droplet ejection. |
5. Phase 3: End-of-Day Shutdown & The "Wet Capping" Protocol (5 to 7 Minutes)
The final 7 minutes of your operating shift are the most critical for machine longevity. Even if you produced only one single garment during the day, the printhead was exposed to atmosphere and must be chemically preserved before you leave the shop. Follow this mandatory four-step shutdown procedure:
1 Step 1: Release Carriage to Maintenance Position
Using your printer’s control panel (or maintenance utility software), trigger the "Head Clean Position" or carriage release function. This disengages the mechanical lock and shifts the printhead carriage into the center platen area, fully exposing the capping station assembly on the right side of the machine.
2 Step 2: Clean the Rubber Capping Station Sealing Lip
Dip a clean, lint-free polyurethane foam swab into approved DTG cleaning solution. Carefully wipe around the entire rectangular rubber lip of the capping station. Ensure you remove all traces of dried ink build-up, gelatinous white ink residue, and cotton fuzz. The rubber gasket must be smooth, supple, and clean to ensure a 100% airtight vacuum seal against the printhead carriage.
3 Step 3: Sanitizing the Rubber Wiper Blade
Take a fresh moistened foam swab and gently clean both the front and rear faces of the rubber wiper blade, along with its top wiping tip. Wipe from the base upward toward the top edge. Inspect the blade under good light: if the rubber appears notched, serrated, brittle, or curled, make a note to replace it immediately, as a defective wiper blade cannot cleanly remove ink droplets.
4 Step 4: The Wet Capping Secret – Overnight Moisture Retention
Here is the secret weapon used by master print technicians: Wet Capping. Using a clean plastic syringe or eye dropper, draw 0.5 to 1.0 mL (approximately 2 to 3 drops) of specialized DTG capping moisturizing solution (or mild printhead maintenance fluid) and dispense it directly into the porous sponge sitting inside the capping station tray. Do not overfill to overflowing. When the carriage parks, the nozzle plate rests suspended just fractions of a millimeter above this liquid-saturated sponge, creating a 100% relative humidity micro-environment that prevents the water-based ink meniscus from forming a dry crust overnight.
6. Four Critical Maintenance Mistakes That Destroy DTG Printheads
Even well-intentioned operators frequently ruin printheads by applying improper techniques learned from non-DTG printing equipment. Avoid these four fatal errors:
❌ 1. Direct Nozzle Plate Scrubbing
Never take a swab or cloth and rub directly across the bottom nozzle surface. The micro-piezo nozzle plate is coated with a microscopic hydrophobic layer that repels ink. Rubbing abrades this coating, causing ink to puddle on the face and permanently deflecting jet trajectories.
❌ 2. Using Isopropyl Alcohol (IPA)
Never use rubbing alcohol or solvent cleaners on a water-based DTG printhead. Alcohol violently precipitates the acrylic polymer resins in textile ink, turning liquid ink into rubbery strings that instantly choke the dampers and internal piezo cavities.
❌ 3. Excessive Consecutive Head Cleanings
Running 5 to 10 deep cleanings back-to-back causes severe suction cavitation inside the printhead, pulling micro-air bubbles past the damper seals and into the nozzle chambers. If two normal cleanings do not recover a nozzle, perform a manual wet cap soak instead.
❌ 4. Using Household Cotton Q-Tips
Standard cotton swabs release tiny fibrous strands that snag on the sharp edges of the capping station and wiper blade. These stray cotton hairs wick ink onto the carriage and easily lodge inside 25-micron nozzle openings. Use only lint-free polyurethane foam swabs.
7. Engineered for Maintenance Efficiency: The GNFEI F85G3 A3 DTG Solution
While manual surface hygiene will always remain necessary for high-precision printing, modern industrial DTG hardware incorporates automated mechanical systems designed specifically to eliminate operator error and protect ink integrity. The GNFEI F85G3 A3 DTG Printer incorporates high-end commercial features that drastically reduce maintenance friction:
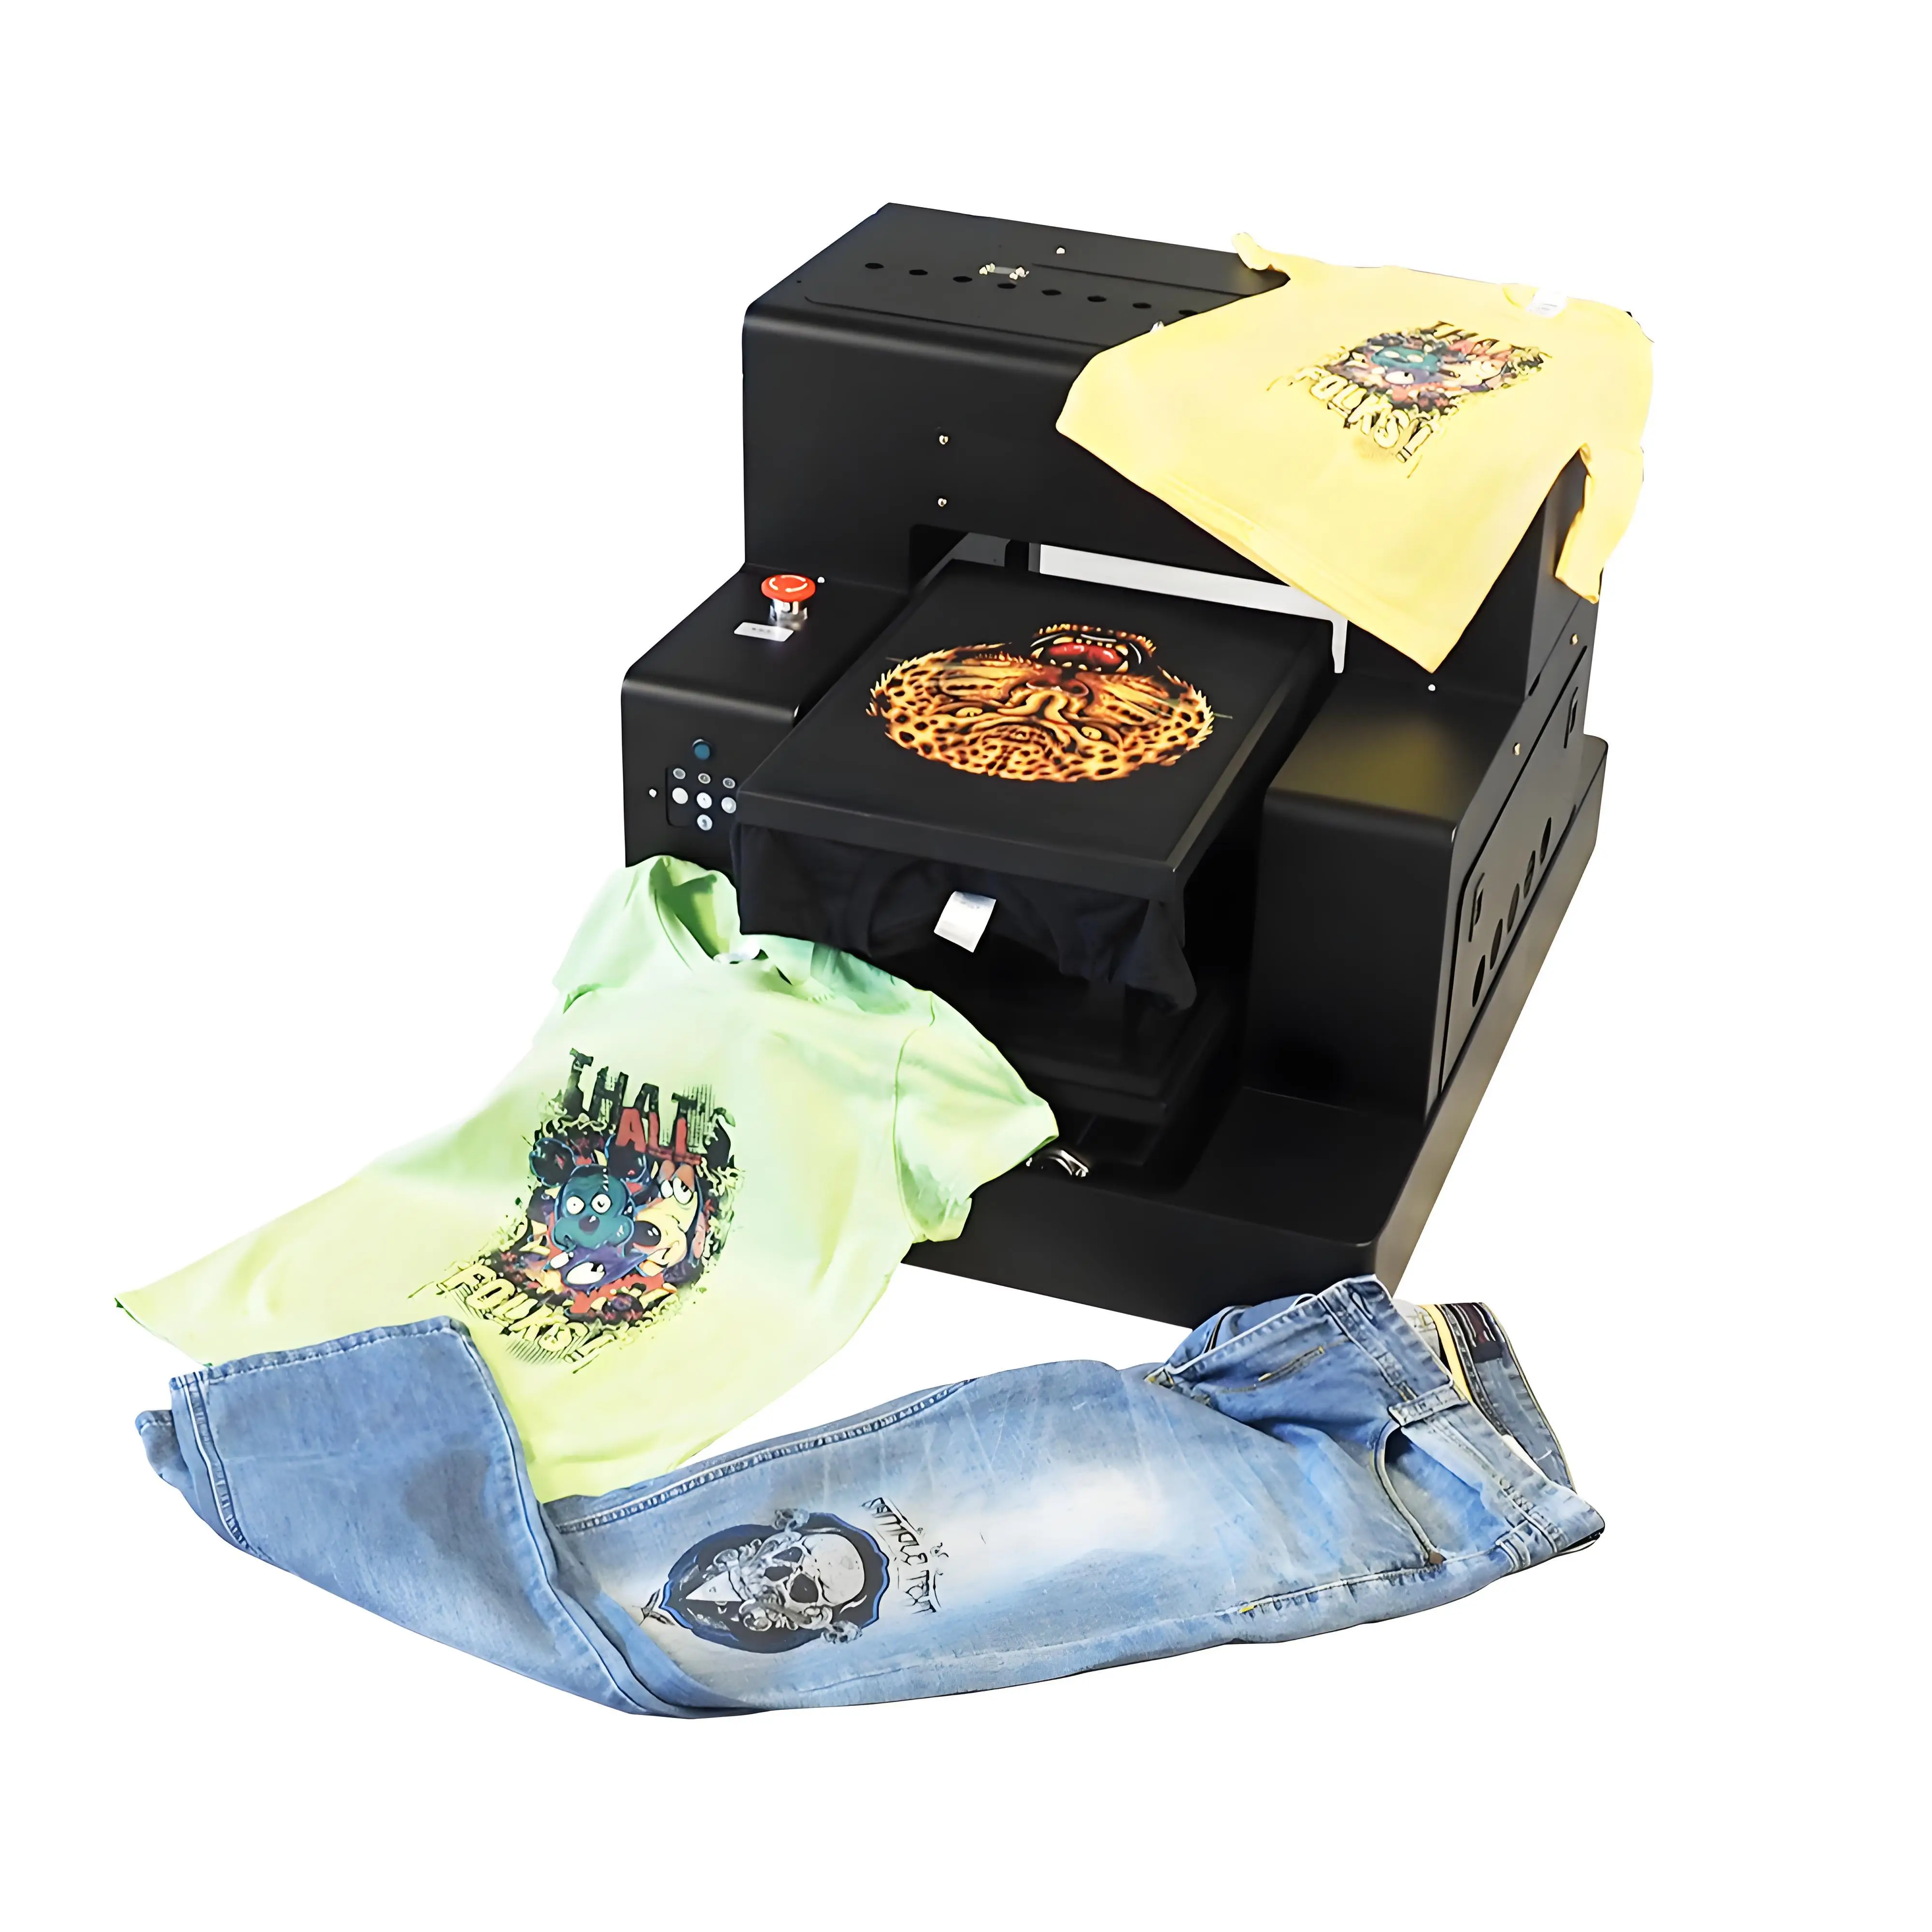
GNFEI F85G3 A3 Flatbed DTG T-Shirt Printing Machine
Equipped with an intelligent White Ink Management System (WIMS) that continuously circulates white ink through the supply manifold, dual Epson MicroPiezo printheads, intelligent infrared automatic platen height sensors to eliminate head strikes, and a precision-sealed peristaltic capping station.
8. Daily DTG Maintenance Printable Quick-Reference Checklist
Print this checklist and mount it directly beside your DTG equipment so every shift operator maintains 100% adherence to quality control:
| Shift Timing | Task Description | Required Tool | Duration | Success Standard |
|---|---|---|---|---|
| Morning (Pre-Power) | Agitate white ink supply bottles | Manual inversion | 60 sec | No dense sediment settled on bottle floor |
| Morning (Pre-Power) | Log shop temperature & humidity | Digital Hygrometer | 15 sec | RH: 50%–70%, Temp: 20°C–28°C |
| Morning (Post-Boot) | Print and evaluate nozzle check pattern | Test paper / clear film | 2 min | 100% complete ladder grid pattern |
| Mid-Shift | Lint-roll garments & sweep platen | High-tack roller | 10 sec/shirt | Zero airborne fibers entering platen bed |
| Mid-Shift (Batch) | Wiper blade residue inspection | Foam swab + DTG fluid | 1 min | No ink paste buildup on wiper edges |
| End-of-Day | Clean capping station sealing rubber rim | Polyurethane swab + fluid | 2 min | Gasket rim entirely black, clean & smooth |
| End-of-Day | Clean wiper blade front, back & tip | Polyurethane swab + fluid | 1 min | Flexible, straight blade free of ink crust |
| End-of-Day | Apply wet capping moisture drops | Capping solution + pipette | 30 sec | Cap sponge saturated; carriage locked in dock |
Frequently Asked Questions: Daily DTG Maintenance & Troubleshooting
Below are clear, technical answers to the ten most frequently asked questions regarding DTG printer maintenance protocols, chemical care, and nozzle recovery:
Q1. How long does the mandatory daily DTG maintenance routine take?
A complete daily DTG maintenance routine takes approximately 10 to 12 minutes total: roughly 3 to 5 minutes in the morning (ink bottle agitation, environmental verification, and nozzle check evaluation) and 5 to 7 minutes at the end of the production day (capping station rim cleaning, wiper blade wipe-down, and wet capping application). Spending these 10 minutes daily prevents hours of troubleshooting and saves thousands of dollars in printhead replacements.
Q2. Can I skip daily maintenance if I didn't print any garments today?
No. Even on non-production days, water-based DTG inks—particularly white titanium dioxide ink—remain volatile and prone to settling and evaporation. On idle days, you must still agitate the white ink, inspect the capping station seal, and run a quick nozzle test to ensure the ink meniscus inside the MicroPiezo channels stays hydrated and fluid.
Q3. Why is cleaning the rubber rim of the capping station so critical?
The capping station forms an airtight perimeter seal around the printhead nozzle plate when parked. If dry ink crust or garment lint accumulates on this rubber sealing lip, micro air leaks form. Air exposure causes water in the ink meniscus to evaporate within hours, resulting in severe dried clogs across multiple channels.
Q4. Why must I use polyurethane foam swabs instead of cotton Q-tips?
Standard household cotton swabs shed loose microscopic cotton fibers. When applied near the printhead carriage, these fibers catch on the sharp stainless edges of the nozzle plate or wiper blade, wicking ink away and jamming directly inside the 20 to 30 micron nozzle orifices. Always use lint-free, solvent-resistant polyurethane foam swabs.
Q5. What is "wet capping" and why is it mandatory for overnight storage?
Wet capping involves depositing 0.5 to 1.0 mL (2-3 drops) of specialized DTG capping moisturizing solution directly onto the capping station porous suction sponge right before docking the carriage for overnight shutdown. This creates a 100% saturated micro-humidity chamber beneath the nozzle plate, preventing the ink meniscus from forming a dry crust overnight.
Q6. How many missing nozzle lines are acceptable before I run a head cleaning?
On color channels (CMYK), 1 to 2 missing nozzle lines per channel are often compensated by multi-pass printing without noticeable banding. However, on white ink channels, zero missing nozzles should be the operational target. If more than 3-5 nozzles are missing across white channels, run a single light cleaning cycle. Avoid running more than 3 consecutive deep head cleanings to prevent damper stress.
Q7. Can I use standard Isopropyl Alcohol (IPA) for daily maintenance?
Never. Isopropyl alcohol (IPA) degrades water-based textile ink chemistries by shocking the acrylic binder into rubbery coagulation. Furthermore, harsh alcohols dissolve the microscopic fluoropolymer hydrophobic repellent coating on the face of Epson MicroPiezo nozzle plates, permanently ruining droplet ejection trajectory.
Q8. What should I do if print room humidity drops below 40% during winter?
If relative humidity falls below 40%, water in the open ink mist evaporates instantly, causing rapid crusting on the wiper blade and platen. You must install an ultrasonic cool-mist humidifier in the immediate vicinity of the printer to maintain 50% to 70% RH, and shorten wiper inspection intervals to every 15 printed shirts.
Q9. Does an automated white ink circulation system (WIMS) eliminate manual daily care?
No. While WIMS continually pumps white ink through supply lines to stop titanium dioxide settling in bulk tanks and tubes, it cannot clean external dried ink crust off the rubber wiper blade, nor can it remove garment lint from the capping station rim. Automated circulation eliminates syringe flushes, but physical surface hygiene remains mandatory.
Q10. How do I know if my capping station rubber seal is failing or warped?
A failing capping station usually presents as stubborn morning nozzle dropouts on the outer nozzle rows despite successful wet capping. To test the seal, deposit 1 mL of cleaning solution onto the capping sponge and park the carriage: if the fluid drains away immediately without pump activation, the seal has lost its vacuum integrity and must be replaced.