How Often to Clean & Maintain a UV Printer? | GNFEI SOP
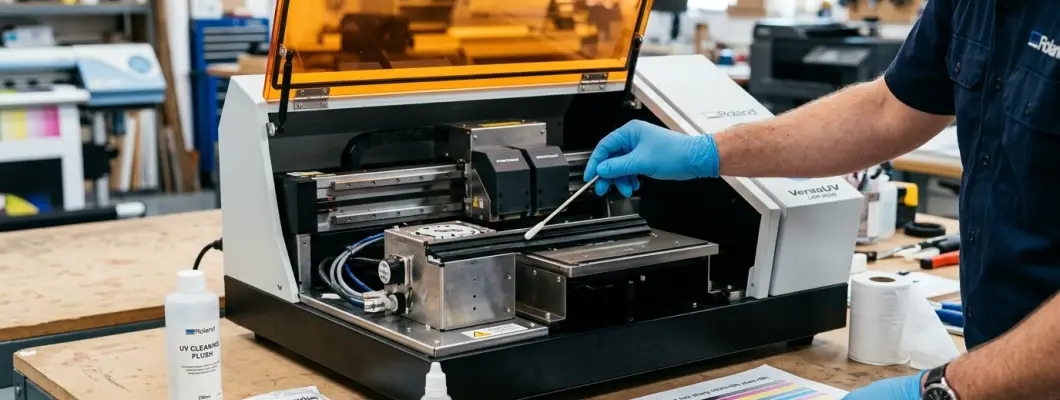
How Often Do I Need to Clean and Maintain a UV Printer?
The definitive daily, weekly, monthly, and holiday maintenance schedule: Protect your printheads, prevent ink crusting, and maximize machine uptime.
1. The Chemistry of UV Inks: Why Maintenance Is Non-Negotiable
Unlike water-based desktop printers or solvent machines that rely on atmospheric evaporation to dry, UV-curable inks never dry by evaporation. They consist of liquid acrylate monomers, prepolymers, and photoinitiators that instantly polymerize into a rock-hard crosslinked plastic shield only when struck by intense ultraviolet light (395nm) or ambient thermal radiation.
This unique chemical property makes UV printing extraordinary for durability, but unforgiving for maintenance:
Crusted UV Ink Does Not Re-Dissolve
If stray UV light reflections, ambient window sunlight, or prolonged air exposure cures ink inside the microscopic 20-micron orifices of an Epson or Ricoh printhead, that blockage cannot be washed out with water or gentle soaking. The nozzle is permanently lost.
Heavy White Titanium Dioxide (TiO2) Settling
White UV ink utilizes heavy inorganic titanium dioxide mineral pigments to achieve high opacity. If left static in ink dampers, tubes, or printhead manifolds without active circulation and agitation, TiO2 settles into thick sludge within 48 to 72 hours, suffocating the printhead.
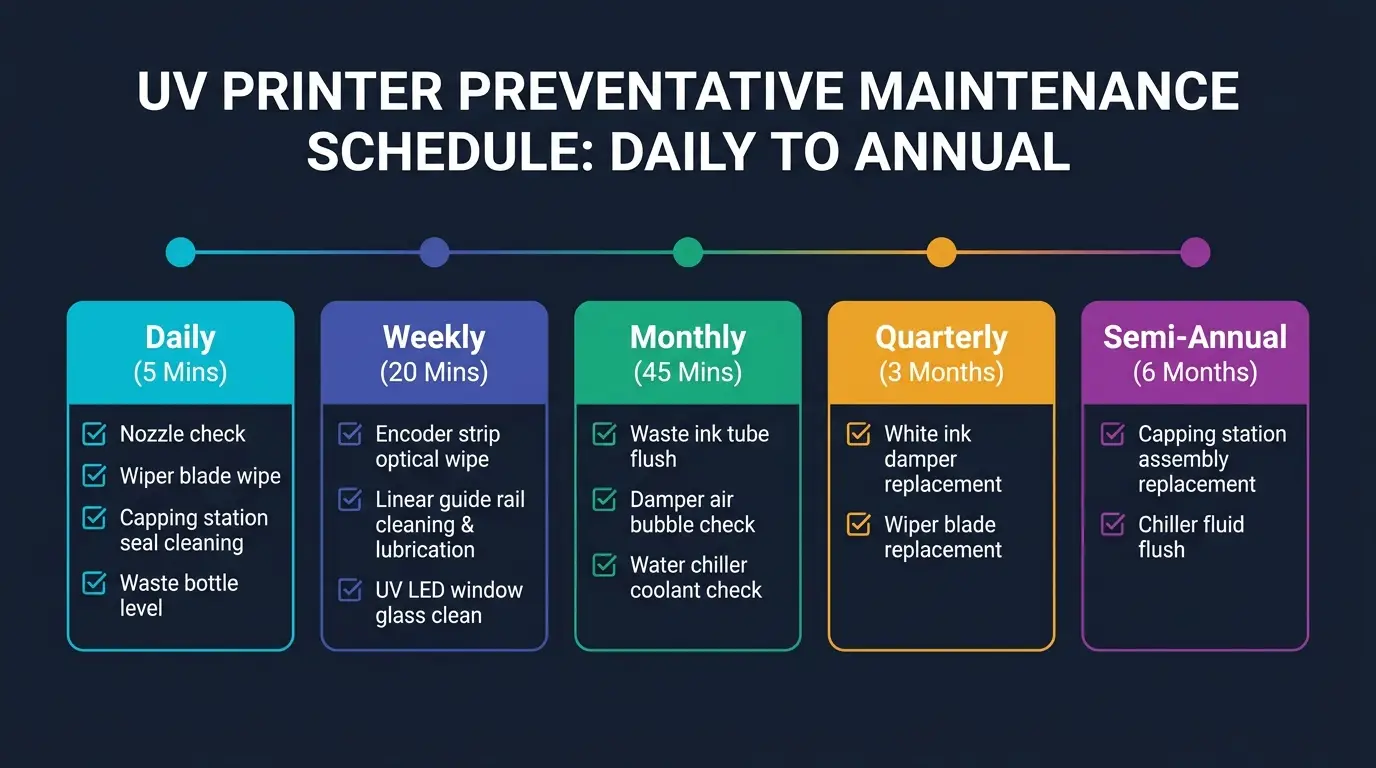
2. The Master Maintenance Timeline: Daily to Semi-Annual
Printshop technicians who follow a strict, disciplined routine rarely suffer unexpected downtime. Here is the visual breakdown of tasks across daily, weekly, monthly, quarterly, and semi-annual milestones:
3. Daily Maintenance Protocol (5–10 Minutes Total)
Daily maintenance is split into two rapid check-ins: a 3-minute morning startup check and a 5-minute evening shutdown seal.
1. Nozzle Test & Waste Verification
Step 1: Power on the machine and activate the white ink circulation pump for 60 seconds.
Step 2: Check the waste ink bottle. Never allow waste ink to exceed 75% capacity to prevent messy backpressure leaks.
Step 3: Print a nozzle test pattern. If all lines are 100% solid, commence production immediately. If missing nozzles appear, perform one standard software cleaning cycle.
2. Wiper & Capping Station Seal
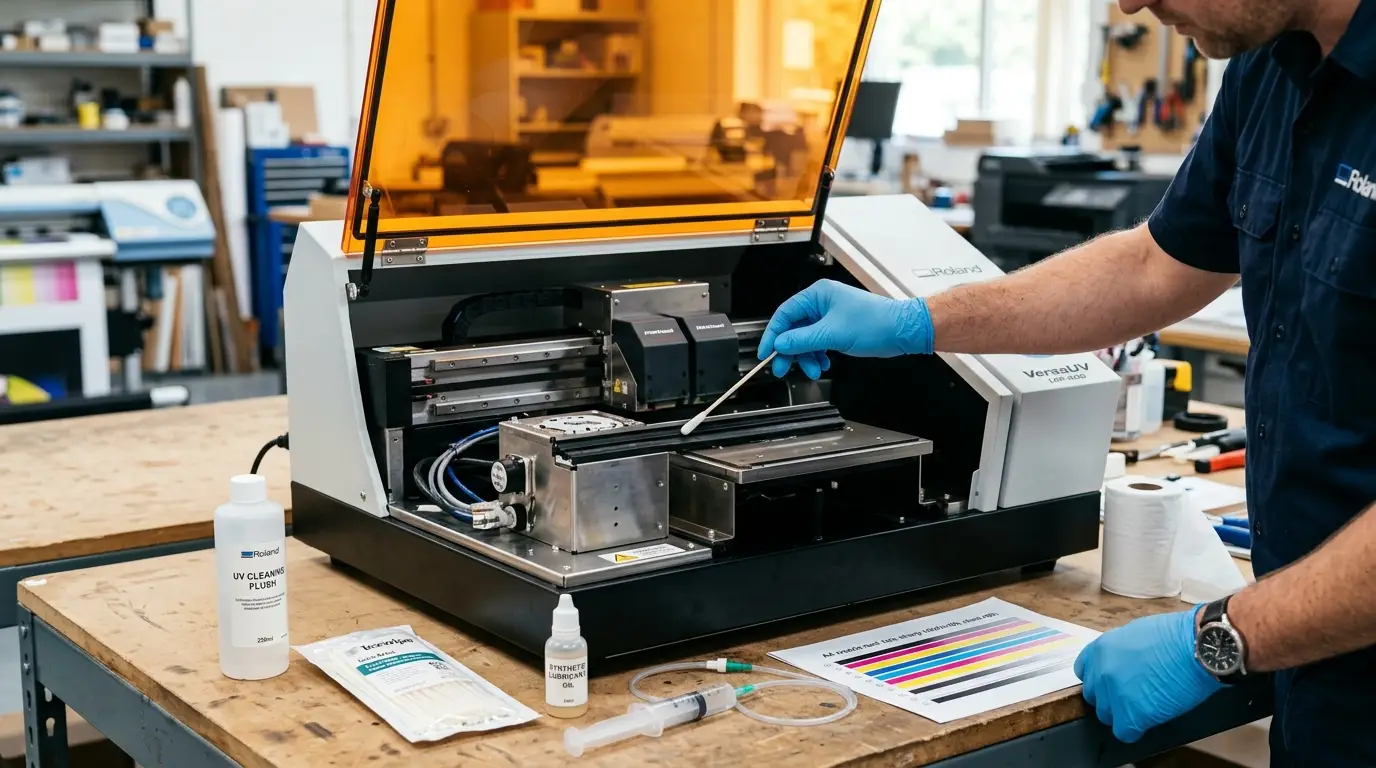
Step 1: Dip a lint-free polyurethane cleanroom foam swab into specialized UV cleaning flush.
Step 2: Gently wipe the rubber squeegee wiper blade to remove crusted ink deposits on both sides.
Step 3: Swab the silicone rubber rim of the capping station to ensure an airtight seal.
Step 4: Deposit 2–3 drops of moisturizing flush onto the capping pad, and park the carriage securely.
4. Weekly Maintenance: Motion Systems & Optics (20 Minutes)
Once a week (typically on Friday afternoon or Monday morning), inspect the mechanical motion axes and optical reading components that ensure high-resolution registration:
Optical Encoder Hygiene
The transparent plastic strip running behind the printhead carriage contains thousands of microscopic optical tic marks. Gently wipe both sides with a dry cleanroom cloth or optical lens tissue. Never use harsh acetone or aggressive solvents that dissolve the tic marks.
Clean & Lubricate Motion Axis
Wipe away accumulated airborne dust, lint, and aerosolized ink mist from the stainless steel linear guide rails. Apply 2 to 3 drops of high-grade synthetic bearing oil or light white lithium grease, then manually sweep the carriage across the bed to distribute lubricant evenly.
Optical Window Clarity
Inspect the quartz glass window beneath the UV LED lamp module. Over days of heavy spraying, microscopic ink mist can coat the glass, blocking ultraviolet photons and reducing curing efficiency. Clean the quartz face gently with a swab soaked in UV flush.
5. Monthly & Quarterly Wear Parts Lifecycle
Even with perfect daily hygiene, mechanical components exposed to aggressive acrylate monomers degrade over time. Proactive replacement of wear components before they fail is the single most effective insurance policy for your printheads.
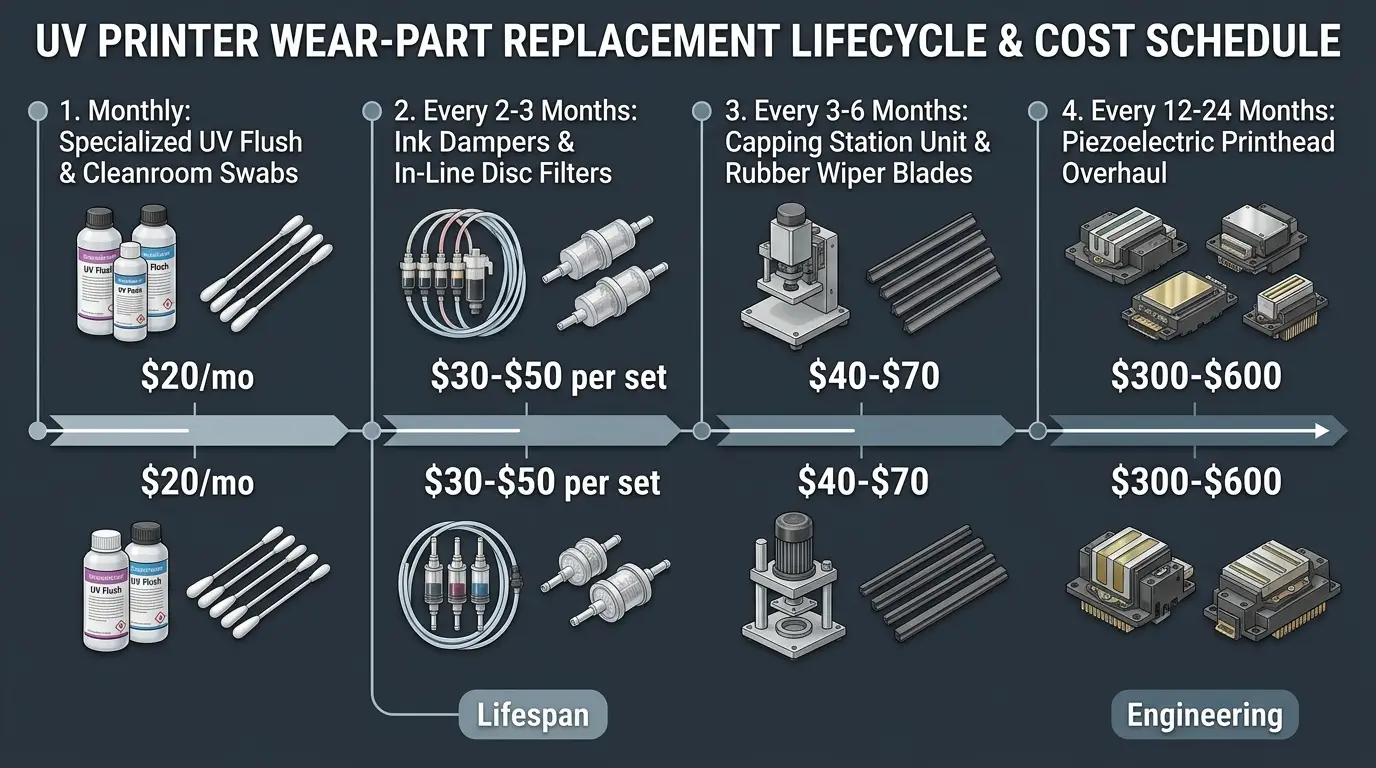
| Component / Task | Maintenance Interval | Procedure & Tool Required | Risk If Neglected |
|---|---|---|---|
| White Ink Dampers | Every 2 to 3 months | Replace with fresh dampers; bleed air using syringe | Heavy TiO2 particles clog micro-mesh, causing ink starvation at high print speeds |
| Rubber Wiper Blade | Every 2 to 4 months | Inspect squeegee edge for nicks or stiffness; install fresh blade | Hardened or nicked rubber scratches the nozzle plate and smears ink into nozzle rows |
| Capping Station Assembly | Every 6 months | Replace cap top pad, silicone seal, and peristaltic tubing | Loss of airtight vacuum seal allows nozzles to dry out overnight; weak suction suction purges |
| Waste Ink Lines | Monthly flush | Inject 20ml warm cleaning flush through cap pump into waste bottle | Dried UV ink deposits clog tubes, causing waste ink to overflow into printer chassis |
| UV LED Chiller Coolant | Every 6 months | Drain reservoir, flush with distilled water, refill with anti-algal additive | Algae and mineral scaling block pump channels, causing UV LED thermal shutdown |
6. Where Does Maintenance Ink Go? The "Purge Tax"
A common surprise for new UV printer owners is the rate at which waste ink accumulates during routine startup vacuum suctions and periodic nozzle cleans:
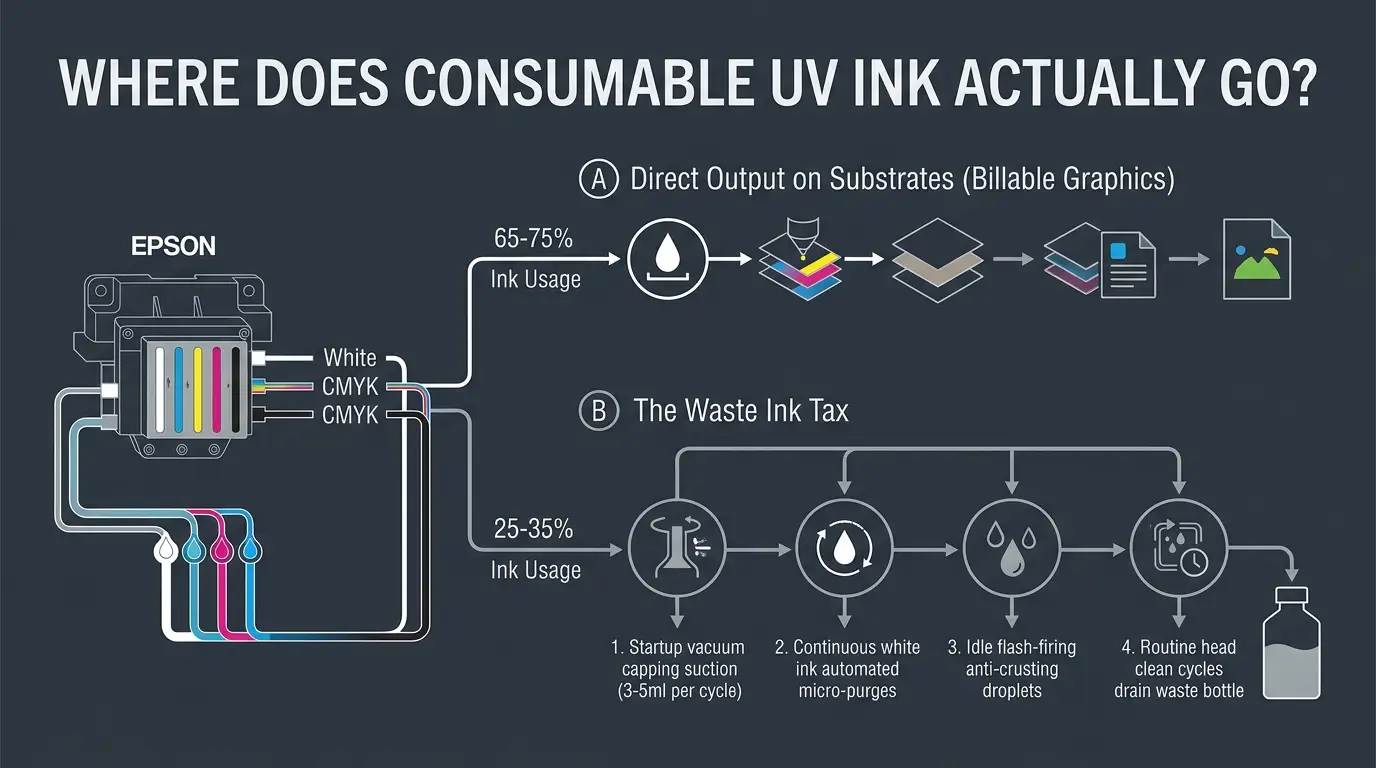
Never skip automated startup cleans to save ink! The 2 to 3 milliliters of ink flushed during a morning purge carries away micro-bubbles, dust particles, and settled pigments that would otherwise solidify inside the nozzle plate. Treat maintenance ink as an essential, high-ROI operational investment.
7. The "Holiday Shutdown" Protocol: Leaving the Printer Idle for 3 to 14+ Days
One of the most frequent causes of catastrophic printhead death is leaving a UV printer unattended during vacations or shop closures. Follow these exact manufacturer standard operating procedures based on your time away:
Moisturizing Capping Seal Protocol
1. Perform a full head cleaning cycle and verify a 100% solid nozzle test.
2. Clean the wiper blade and capping rubber rim thoroughly.
3. Fill the capping station sponge with specialized non-volatile UV moisturizing preservation liquid.
4. Park the carriage firmly on the cap top and turn off the main power switch.
5. Clamp the waste ink discharge tube with a plastic hemostat clamp to prevent air siphoning.
6. Cover the entire printer with an opaque, light-blocking sheet to eliminate stray UV rays.
Complete Flush & Fluid Preservation
1. Empty all UV ink bottles and flush ink lines with certified UV cleaning flush until tubes run clear.
2. Draw special moisturizing preservation liquid through all dampers and printhead channels.
3. Leave moisturizing fluid inside the printhead manifolds (never leave heads dry!).
4. Cap and seal the carriage tightly as detailed in the short absence protocol.
5. Store inks in a climate-controlled dark cabinet between 18°C and 25°C.
8. Low-Maintenance Hardware Platforms Engineered for Reliability
Selecting a printer with built-in automated ink circulation and industrial-grade capping mechanisms significantly reduces manual cleaning labor:
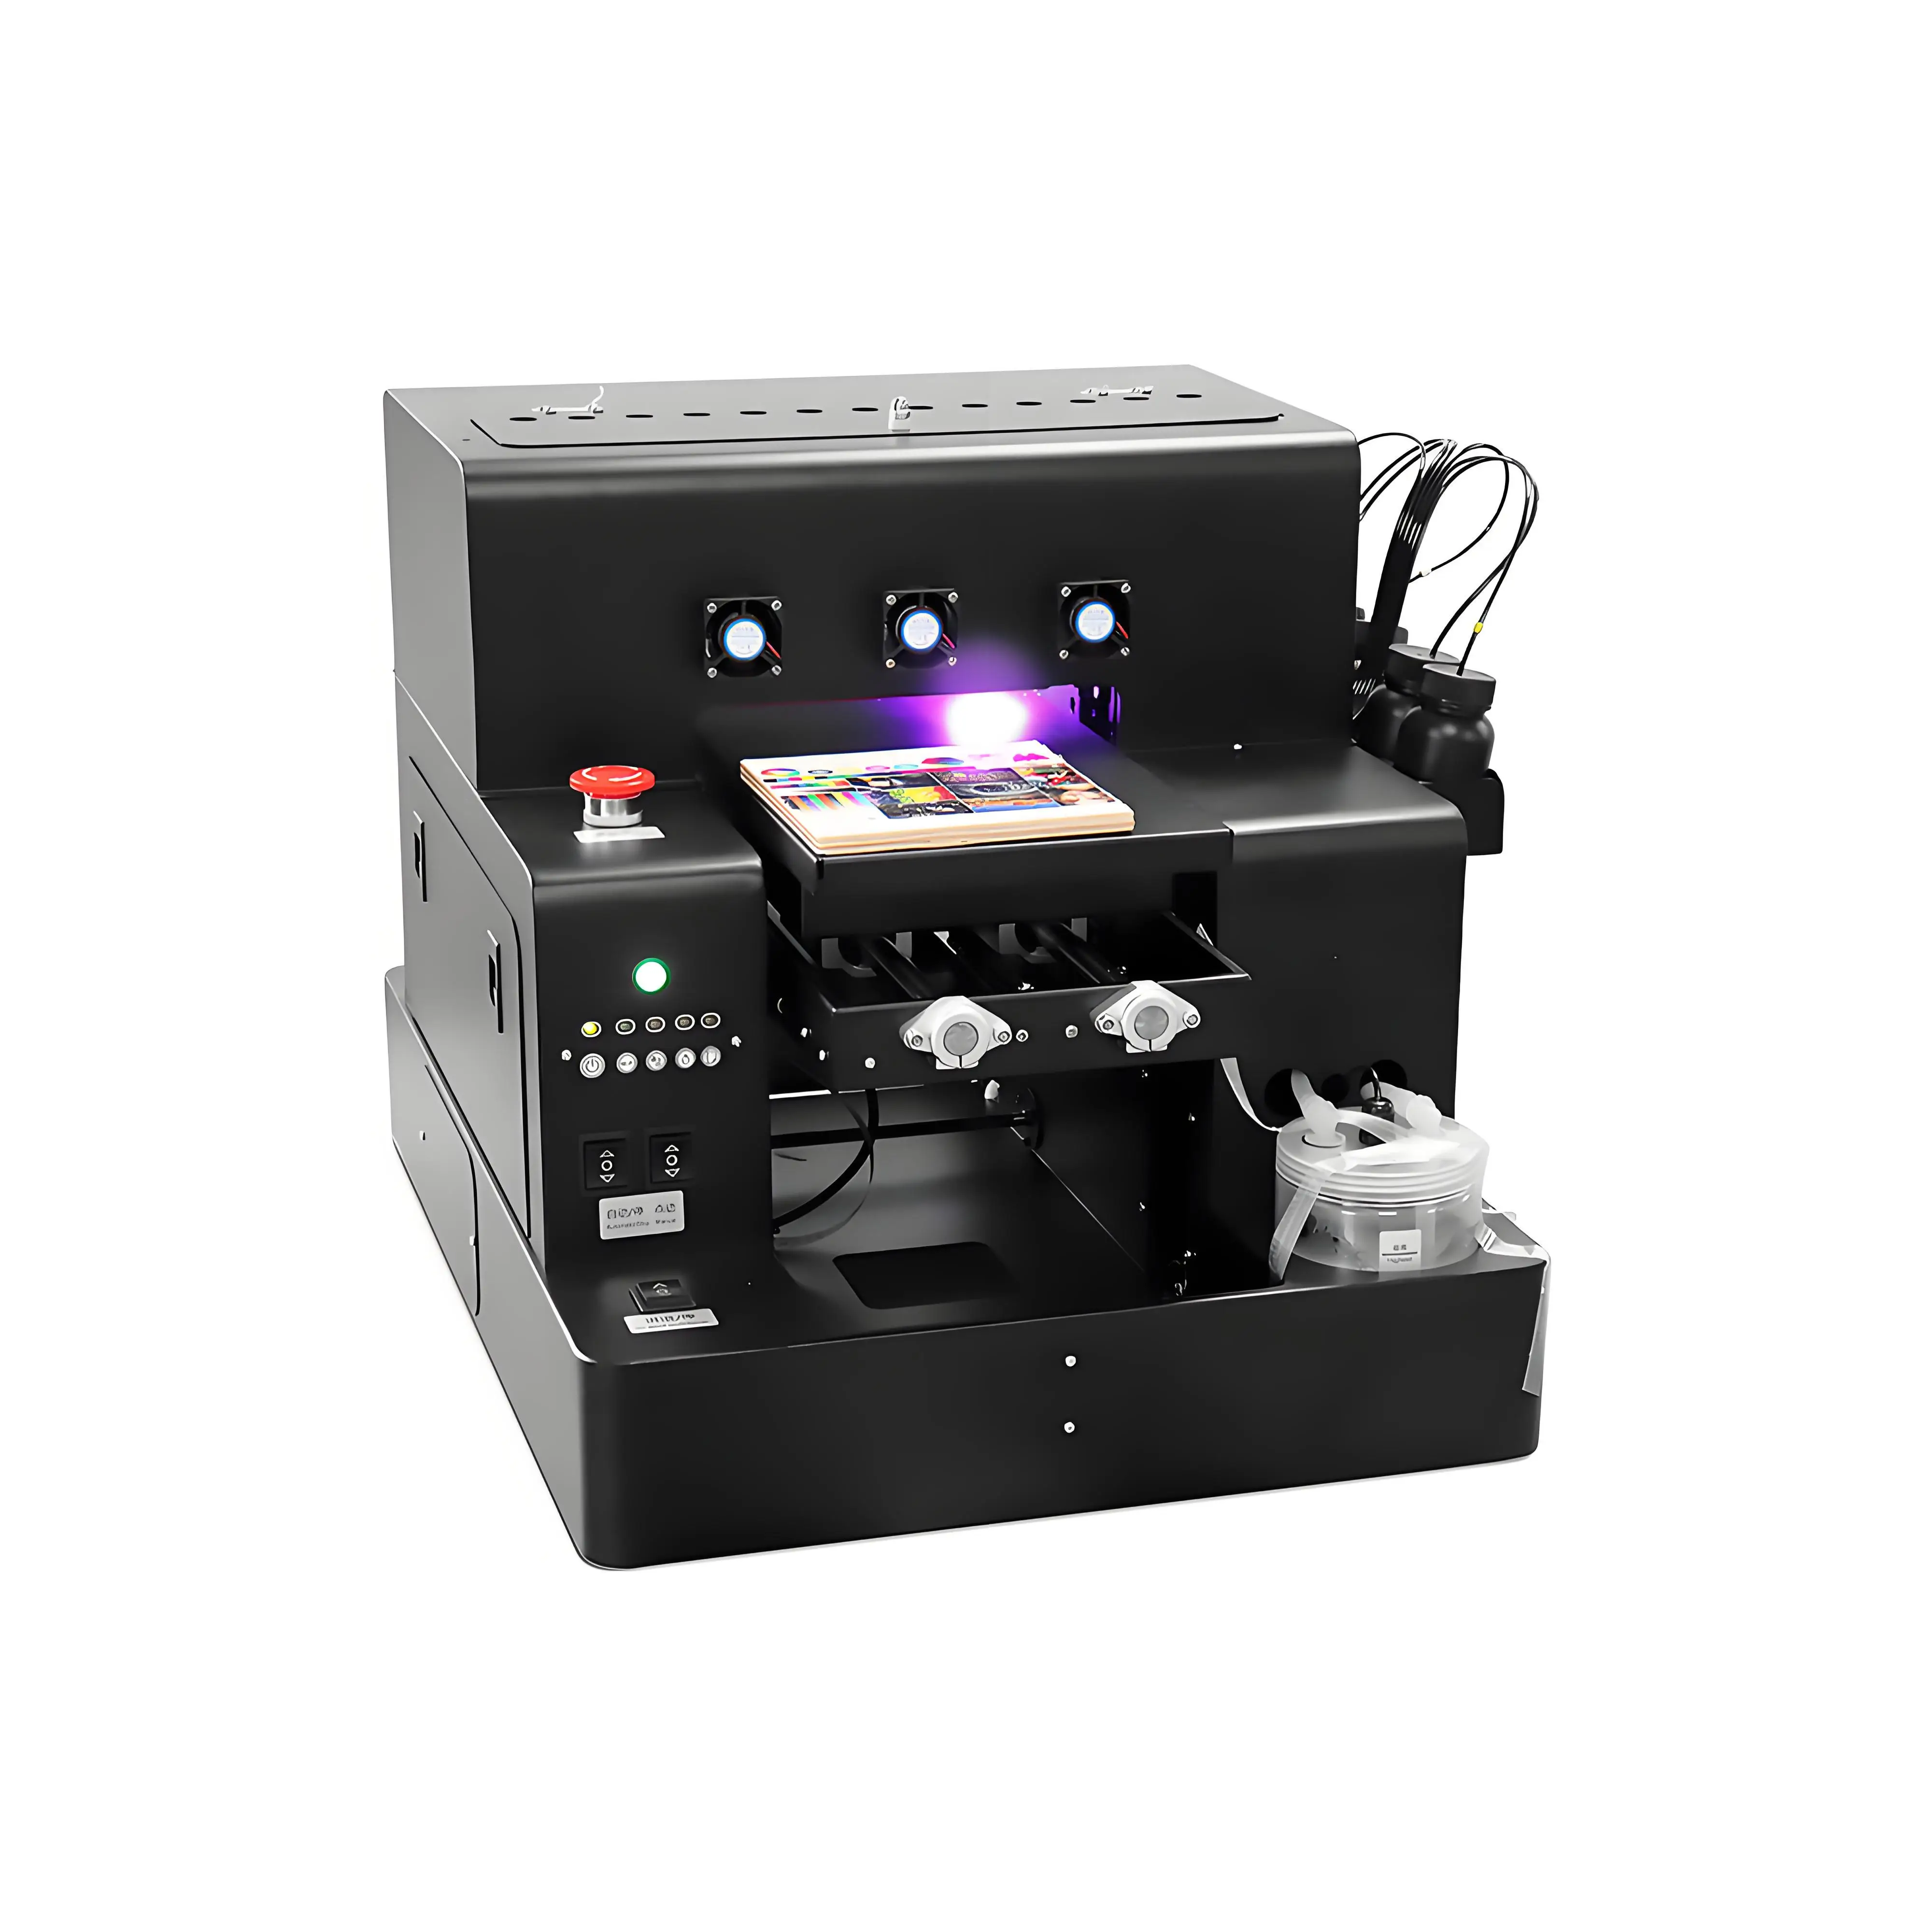
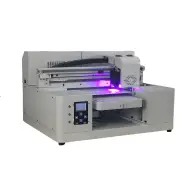
Spot A4 LED UV Printer Cylinder Printing Machine
- Automated white ink circulation pump runs on timer to eliminate manual shaking and white damper clogging
- Automatic infrared height detection sensor prevents accidental substrate head collisions and nozzle strikes
- Precision water-cooled 395nm UV LED lamp with 25,000+ hour operating life and minimal heat output
- Modular rotary cylinder attachment included for printing bottles, tumblers, and glassware
- Accessible capping station assembly for effortless 2-minute daily evening maintenance
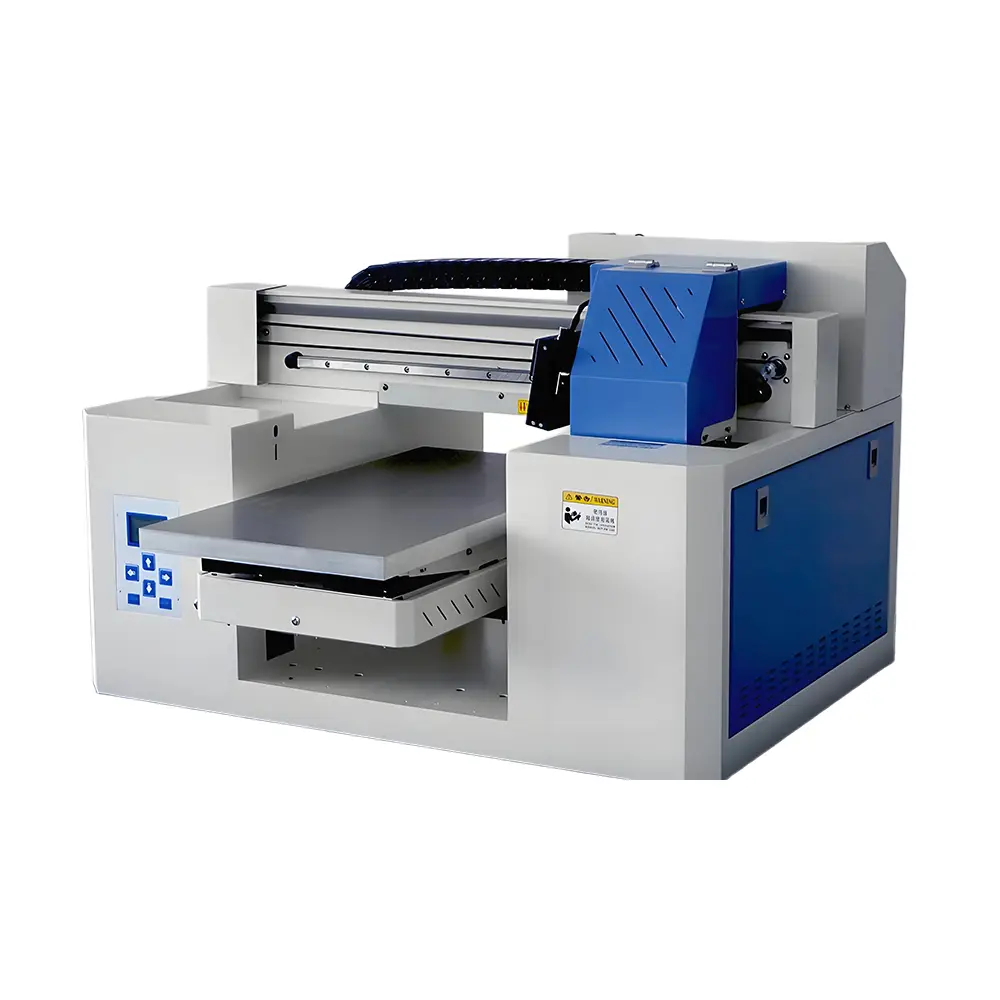
A3 Dual Head UV Printer (Rotary & UV DTF Support)
- Dual Epson printheads separate White and CMYK/Varnish channels, doubling speed and isolating white maintenance
- Integrated negative pressure vacuum suction platen secures lightweight films and flat media firmly
- High-capacity independent peristaltic waste ink pumps ensure strong, reliable automated capping purges
- Motorized 15 cm (6-inch) Z-axis clearance accommodates large custom gift boxes, tumblers, and signs
- Supports Direct Flatbed printing, Rotary cylindrical drinkware, and peel-and-stick UV DTF transfers
Frequently Asked Questions (FAQ)
Q1. How many minutes a day should I allocate to UV printer maintenance?
Expect to spend approximately 8 to 10 minutes total per production day: 3 minutes in the morning for a nozzle check and white ink circulation, and 5 minutes in the evening to clean the wiper blade and capping rubber rim, and apply moisturizing flush.
Q2. What is the single biggest cause of UV printhead death?
The leading cause of printhead failure is neglecting the capping station. When ink crusts on the rubber rim, the cap loses its airtight seal overnight. Air dries the ink in the nozzles, and ambient UV reflections permanently cure it inside the microscopic channels.
Q3. Can I use standard isopropyl rubbing alcohol (IPA) on my printhead?
No. Standard isopropyl alcohol dissolves internal glue bonds inside piezoelectric printheads and strips the hydrophobic coating on the nozzle plate. Always use specialized UV cleaning flush designed specifically for your printhead model.
Q4. Why shouldn't I use grocery store cotton swabs?
Standard cotton swabs shed microscopic cotton fibers that snag on the sharp edges of the nozzle plate. These fibers wick ink away and deflect firing angles, causing severe banding. Always use lint-free polyurethane cleanroom foam swabs.
Q5. How often should I replace white ink dampers?
White ink dampers and in-line disc filters should be replaced every 2 to 3 months. White ink contains heavy titanium dioxide (TiO2) particles that clog the fine mesh filter inside the damper, leading to ink starvation at high print speeds.
Q6. What is the risk of using aggressive solvents on the encoder strip?
The optical encoder strip features microscopic printed tic marks. Strong chemical solvents like acetone or MEK will dissolve these printed lines, causing carriage sensor errors, severe double printing, or carriage slam accidents.
Q7. How often should the capping station assembly be changed?
Replace the complete capping station assembly every 6 to 9 months. The silicone rubber seal hardens over time from monomer exposure, losing flexibility and compromising both vacuum suction strength and overnight airtight protection.
Q8. What should I do if taking a 10-day holiday vacation?
For absences over 7 days, either set up a trustworthy operator to run daily cleans, or perform a complete line flush: fill lines and printhead channels with moisturizing preservation fluid, clamp waste lines, cap tightly, and cover the printer completely from light.
Q9. What lubrication should I use on the linear guide rails?
Use light synthetic linear guide bearing grease (such as NSK, THK, or Mobil 1 synthetic) or high-grade sewing machine oil. Never use WD-40, automotive motor oil, or sticky spray lubricants that attract airborne dust and bind carriage bearings.
Q10. Why does white UV ink require continuous active circulation?
Titanium dioxide (TiO2) particles in white ink are twice as dense as color pigments. Without regular mechanical circulation or agitation, the pigment settles to the bottom of the bottle and dampers in under 48 hours, creating solid blockages.